#Snapshot TDD
One of my recent weekend side projects, an e-ink / raspberrypi driven build status dashboard, was a great playground for doing TDD powered by visual snapshots. But let's rewind a bit.
Goals
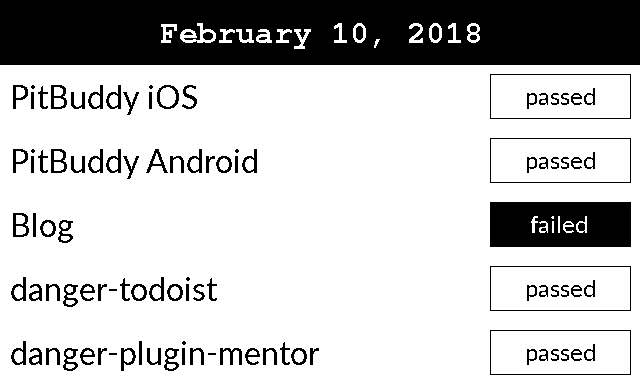
What I actually wanted to achieve was the following: Build a semi-decent python class to draw a dashboard type interface, which I can feed to my e-ink display. I had already prototyped such a script, but it was a "make it work in the quickest possible way in 1 hour" mess. Nothing I wanted to maintain or even look at for even five more minutes. I also didn't want to start completely from scratch regarding the output, because I was happy enough with the result this script produced, which is shown here:
So how could I develop the code from scratch, while making sure I got the exact same output in the end? Right, creating myself a feedback loop that will quickly compare the reference image to the current output. To quote from jest:
Snapshot tests are a very useful tool whenever you want to make sure your UI does not change unexpectedly. A typical snapshot test case for a mobile app renders a UI component, takes a screenshot, then compares it to a reference image stored alongside the test.
This is powerful, because how else would I test this? Things of visual nature are not unit-tested easily, which is why they are often simply untested. We usually don't test stylesheets, colors, images etc. However we can't say those things are unimportant. So I set out to do TDD with snapshots and iterate myself toward the reference result.
Setup
Based on my prototype I already had a reference image to compare against. But simply putting two images side-by-side is barbaric, and we can do better. I grabbed myself a copy of pixelmatch, a Javascript image comparison library, copied the sample code, and boom, there was an image diff clear as day. With the full result compared against a plain white image, it looks like this.

Lot of work left to do, sure, but that set myself up for about a two second feedback cycle. The process, which I packaged into a simple npm test bound to <leader>t in VIM so I can invoke it in one keystroke, is this:
- Run unit tests in python (This is just one dumb test for the constructor, I should remove it)
- Render current image to
actual.pngin an "integration" test - Create image diff with pixelmatch
- Open this diff in Preview so it jumps into my face
See the process encoded here, and yes, the irony of having a node based test invocation for a python script is not lost on me. Computers 🤷🏼♂️
Example
Let's walk through one of my commits together. I really enjoyed working like this. A few minutes in, I had the rendering of the header, header title, project text to the left all fleshed out with minimal differences to the reference. I assume something regarding the font-rendering on the raspberrypi/debian vs. my mac is to be blamed for the tiny deviations around the text. No clue though. So here I was:

Lets add some code to render the badge text on the right:
    def __render_row(self, row):
         self.__render_project_name(row)
+        self.__render_project_status(row)
+
+    def __render_project_status(self, row):
+        start_y = (row[0] + 1) * self.__row_height()
+        badge_width = 150
+        padding = 10
+        pos = (self.__from_right(badge_width), start_y + padding, self.__from_right(padding), start_y + self.__row_height() - padding)
+        self.draw.rectangle(pos, outline = self.BLACK)
+        self.draw.text((self.__from_right(badge_width + 35), start_y + 17), self.PASSED, font = self.badge_font, fill = self.BLACK)
Hit <leader>t, and see this:

So obviously I got the alignment wrong. Lets fix it:
         padding = 10
         pos = (self.__from_right(badge_width), start_y + padding, self.__from_right(padding), start_y + self.__row_height() - padding)
         self.draw.rectangle(pos, outline = self.BLACK)
-        self.draw.text((self.__from_right(badge_width + 35), start_y + 17), self.PASSED, font = self.badge_font, fill = self.BLACK)
+        self.draw.text((self.__from_right(badge_width - 35), start_y + 17), self.PASSED, font = self.badge_font, fill = self.BLACK)

     def __render_project_name(self, row):
        index = row[0]
Re-run the tests, see this:

Less red! That's basically what I did over and over again. Feel free to have a look at the commits for more examples.
My takeaways
- Fast feedback is gold
- Even visual feedback is good
- I wouldn't have wanted to unit test this, so quick visual feedback is way better than no feedback. Let's remember that coding this up, syncing the code to the rasbperrypi, actually running the code and see the output on the e-ink display is a multi-minute process!
- Keep snapshot tests in your toolbelt, there is a place and time for them, and it's not only react!
- Updating the reference image is displayed really nicely in github